


What if your website is really good and includes a lot of colorful pictures? But it takes a while for your site to load. Isn’t it annoying? Websites often load slowly because they contain large image files, especially PNG files that aren’t optimized. If you want your website to load quickly and keep customers happy, you should learn how to resize images naturally.
This blog will show you how to simply resize PNG images without sacrificing quality. It will help you speed up and make your website easier to use. And the best part? Pippit AI is a free online tool that lets you resize PNG files so that they look better on the web.
Why Resizing PNG Images is Important for Website Speed

PNG images are popular because they support transparency and look beautiful. But they might also be incredibly huge, which makes your website load more slowly. People can leave before they view your content if the pictures take too long to load. This can make your website run slower and lower its rating in search engines.
You modify the size of PNG images so that they suit the space on your site where they will be displayed. Images that are smaller in size sometimes have smaller file sizes, which means they load faster. But the most important thing is to resize photographs in a way that keeps them clear and sharp without sacrificing quality.
What Does It Mean to Resize PNG Images Naturally?
Natural resizing is when you change the size of your PNG images so that they still look sharp and professional. If you resize photos the wrong way, they can get stretched, pixelated, or blurry. This keeps that from happening. This is crucial since terrible photographs could make your site look unprofessional and push users away.
When you resize PNG images the right way, your pictures will still look excellent and your website will work better. This is where pippit.capcut.com really shines as an easy solution to change the size of PNG files without sacrificing quality.
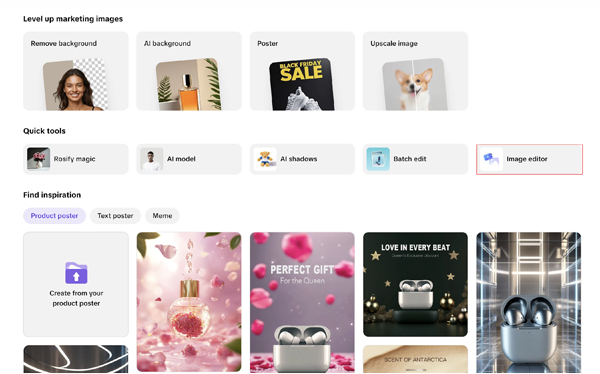
How to Resize PNG Images with Pippit in 3 Simple Steps
Pippit AI makes it simple and quick to adjust the size of your PNG files. Do it this way:
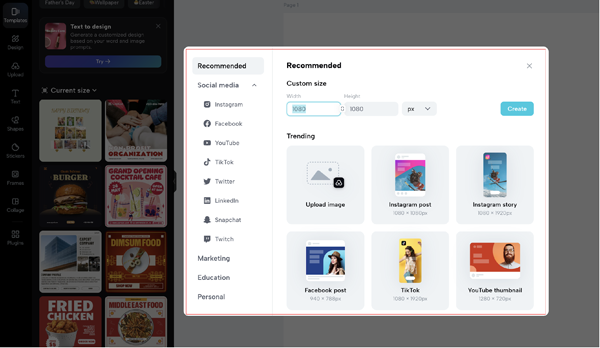
Step 1: Import the PNG Image – To start, go to Pippit’s website and log in to the Image Studio. Put the PNG file you want to resize into the Image Editor. You don’t need a credit card or a lot of time to get to this point. You can upload a lot of files at once using Pippit AI. This means that if you have a lot of PNGs, you can import them all at once to save time.
Step 2: Select the Aspect Ratio or Custom Dimensions – Next, decide the size of the PNG photo you desire. Pippit AI has defined sizes for items like social network postings, e-commerce listings, and website banners that are normal. You can also type in your own width and height figures if you need a specific dimension. You don’t have to worry about the image getting distorted or pixelated as you resize it because the program preserves its quality. This natural way of resizing makes sure that your photographs look sharp and professional.
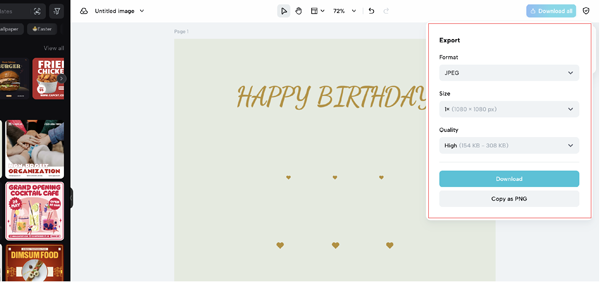
Step 3: Preview and Export the Resized Image – Take a quick check at the scaled PNG before you finish to make sure it looks good. If you need to, you can modify things like cropping or color enhancement straight in Pippit AI. Export the picture to acquire a high-resolution copy when you’re happy with it. Your PNG is now the right size to load faster on your website, in email campaigns, and on social media.
How Resizing PNG Images Improves Website Performance
When you change the size of PNG images, the quality stays the same, but the file size gets smaller. Your website will work better if you have lesser files because they load faster.
A better experience for users: Visitors don’t have to wait long for photos to load, which makes browsing easy and exciting.
Better SEO: Websites that load quickly are more likely to come up higher in search results.
Uses less bandwidth: Smaller graphics consume less bandwidth, which is good for folks who use mobile devices or have slow internet connections.
Higher rates of conversion: Faster websites keep people interested, which makes it more likely that they will buy something, sign up, or interact with your content.
When to Resize PNG Images for Your Website
You can keep a decent balance between speed and quality if you know when to change the size of PNG files. In these frequent scenarios, scaling is necessary:
Uploading photographs of products: PNG files are often used for product listings on e-commerce sites. Resizing makes sure that pictures load quickly and show all the details.
Making thumbnails: Small preview images need to be shrunk so that full-size files don’t have to be loaded.
Posting on social media: Each site needs photographs that are a specified size. These sizes for PNGs make sure that your posts look beautiful no matter where they are.
Email marketing: Email clients have limits on how big pictures may be. Changing the size of your emails makes them load faster and look better.
Pippit AI makes it easy and consistent to resize for these objectives, so your images are always the right size for what you want them to achieve.
Conclusion
Changing the size of PNG pictures is a simple but efficient way to speed up your website and make it nicer for consumers. If your site has huge, unoptimized photographs that slow things down, visitors can get irritated. But if you do things right, you can keep your photos looking good and your pages loading swiftly.
Pippit AI is a free, simple program that enables you change the size of PNG images quickly and efficiently without losing any quality. Pippit AI will make your digital content shine and make your website perform better, whether you have a blog, an online store, or just post pictures on social media.
What are you waiting for? With Pippit AI, you can start resizing your PNG images today and make your website run faster and smoother for your visitors!


